The installation of the screened in porch is complete! If you are new around here and would like to get up to speed on this project you will need to start here - Part I, Part II, Part III, Part IV.
Have you ever read an interior design blogs post about a project a designer is currently working on - only to find they never do a follow up post on the completed project? It can be very frustrating when you REALLY want to see that finished project. And I use the word "finished" lightly here because you and I both know spaces evolve over time.
Well, today, I'm going to show you the finished product.
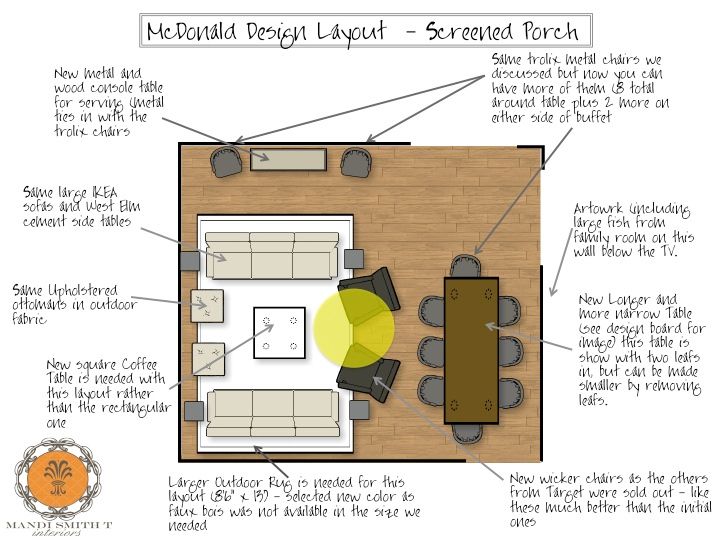
Remember, here's the design layout board for the screened in porch.
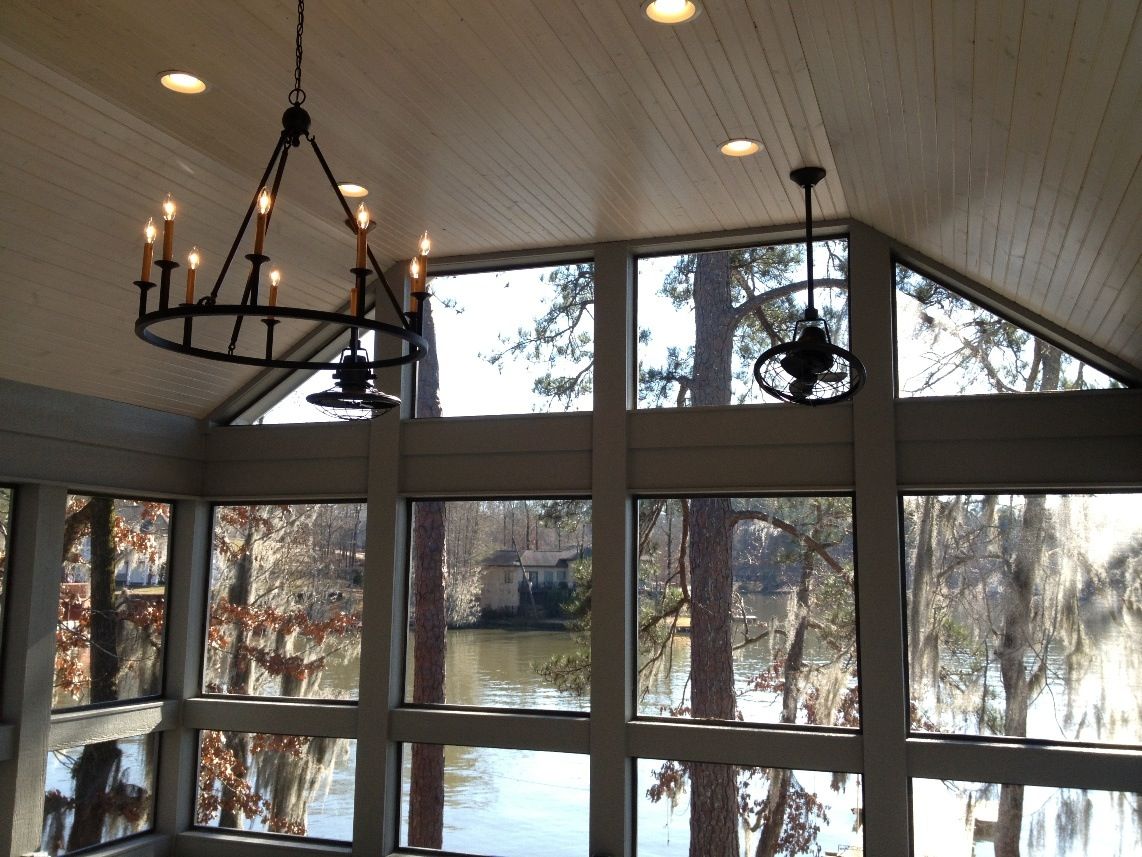
And here are a few images of the space after installation. Look at that view! This image was taken from inside the family room (you can sort of see the reflection of the glass).

Here is the finished structure. It has completely transformed the house.

This is the side entrance to the screened in porch. As you can see, they still have a very nice outdoor space to enjoy the lake.

We did a white wash finish on the ceiling to keep things like and airy and to give us the contrast we needed to show off the gorgeous chandelier and ceiling fans.
Here's a image of the space at night.

Looking to the family room. I think I mentioned this to you before, but it's worth a second mention. Do you see the door to the left? This small change provide huge benefits to the space. Previously, the door opened into the family room which (as you can see) is a very narrow space. By changing it out with a glass paneled door and allowing it to open into the screened in porch we have gained floor space in the family room and created visual openness by allowing your eye to "steal" the outdoor space through the glass panes. Small change, huge impact.

We decided to edit out the pair of chairs (at least for now) that were separating the seating area from the dining area. The clients will live with this layout for the summer and decide if they think additional seating is essential. The space still feels finished without the chairs and gives a very open feeling.

This is the view from the lake side - notice the cement side tables next to the screen. It's important to consider using materials that can withstand the elements in spots near the screen.

I'm thrilled she decided to go with the trolix chairs out here. I just love the industrial, rustic vibe they give the space. As an aside, I originally gave the client two options for the trolix chairs - a less expensive one with arms and these (which were still quite affordable, compared to the original trolix chairs). They ended up going with the more expensive option. I'm so glad they did because the chairs without arms have allowed for more seating at the table.

I also love this spot. This is what you see when you walk out the back door. These "sight lines" are so important to think about when you are designing a space. You really want to see something interesting when you walk by the back door and look beyond. Also love the additional chairs when you have extra guests as these can be pulled up to the seating area.

Ok, so I couldn't resist. Here is the before . . .
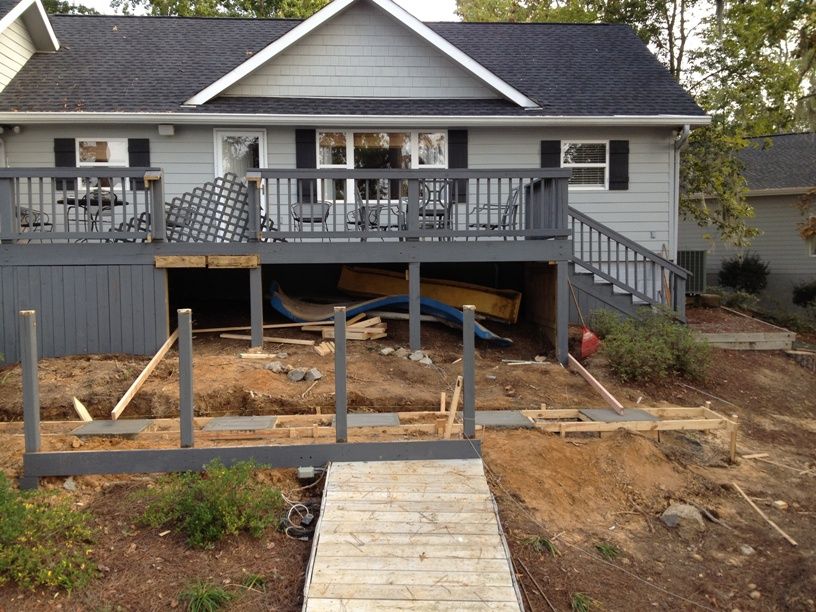
And here's the after . . .
Lastly, I don't think I showed you a picture of the complete front gable.

Even their cute dog, Rusty is thrilled with the results. Now they are truly ready for a memorable summer! M.
Tidak ada komentar:
Posting Komentar