Tampilkan postingan dengan label DIY. Tampilkan semua postingan

Minggu, 06 Desember 2015

Entryway Arrangement Tutorial

As many of you know, I grew up in Mississippi on a large piece of property outside the city of Laurel. Every Christmas (even before Martha Stewart made it cool), my family would go out on our property and cut fresh greenery to decorate with during the holidays -  wild magnolia and bay leaf, holly, cedar and other evergreens, wild pyracantha and even chestnuts.  I grew up watching my mother create some of the most stunning arrangements you can imagine.  We used all different kinds of containers from large french baskets to galvanized oval shaped tubs.  So, decorating for Christmas brings back lots of wonderful memories for me, and I just love the process. 

I mentioned last week I would show you how to put together a large arrangement for your home like the one I did for Christmas Count Down.  Here's the final arrangement I made for the night.

And, here it is on my buffet in my dining room.  I changed out the branches for sandblasted manzanita branches to give me the look I wanted for my dining room, but it's the same arrangement.


Large arrangements are much easier to make than you think.
In general, remember "the rule of 3's."  There are three types of greenery, three types of ribbon,  three types of ornaments and the entire arrangement is laid out in a triangle.


Create a base layer by bunching up some burlap.  I bought mine on a random trip to Hobby Lobby.  It's just cut yardage, so I folded the cut edges under.

Select a container with some height.  I've had this container for years, and I use it for lots of different occasions.  It was an investment at the time, but I'm so glad I have it.

For a wire container, line it with moss and then place a water tight container in the center filled with floral foam that's been soaked in water.  As an aside, when soaking your floral foam, fill up a basin with fresh clean water and drop the foam in - that's it - do NOT push it down to submerge in the water, let gravity fill the foam properly)

Use floral stick tape to secure the foam to the bowl.

Every well designed arrangement includes something tall, fullness in the middle and something draping.  (another rule of three).  I like to start with the tall, I placed three large branches in the center making sure they're angled out a bit to provide space for the ornaments.

I added the draping element - these branches were from a very sun deprived scotch pine in my mother-in-laws yard!  It's a little difficult to see (b/c I'm not a great photographer), but I have grouped these draping branches to form a triangle.


Then I filled in around the base of the branches with large magnolias to cover the bowl, foam etc.  The shiny leaves are a nice contrast.   Again, I grouped them in three clusters to form another triangle.

Then, I filled in with some cedar just to draw your eye up to the the ornaments on the branches


Almost finished!  I added some ribbon to create a contrast in color with the greenery.  I used three different ribbons with three different textures.  I think when you cut all the greenery out of your yard (or a friend's yard!) you can splurge a bit on the ribbon.

Final step, I placed ornaments on the branches in a sparse way - three different kinds.  Don't over do it or it begins to looks like a hot mess!


Lastly, I added something special to the table - packages of Christmas cards from years past.  I've been collecting Christmas cards from each year since I got married.

During the season, John and I will pick a night to sit down with a glass of wine and go through some of the bundles.  It's always fun to see how people change and families grow.

I hope this encourages you to try an arrangement of your own! Have a great week.  M.

Rabu, 02 Desember 2015

Are you in the Spirit Yet?

I have hit the ground running this week.  In addition to my design projects, I am helping a few clients style their homes for the holidays.  We are working on fresh greenery for their entryways, mantels and even outside on their front doors.  Some are simple additions for their family's enjoyment while others are more elaborate decorations for hosting Christmas parties during the season.
For me, this type of thing is simply another form of styling the home, and I LOVE it. 

First up for the season, I was invited to participate in Christmas Count Down.  This is held every year at Covenant Presbyterian Church where lots of very talented people create Christmas displays for a ladies night full of ideas on how to decorate your home for the season.  My display was entitled "Entryways and Side boards" and was intended to give you ideas on how to make a great first impression as visitors enter your home during the holidays.  Here's the finished arrangement.

I took pictures of the entire process, and my plan is to show you step by step how to create one for your entryway. So stay tuned . . . I'll try to post it next week.

In the meantime, here are lots of the other displays at the event.
This cute table was entitled, "A few of our favorite things," and it included all kinds of handmade gifts (AND not a single cookie, which is just my thing!).  

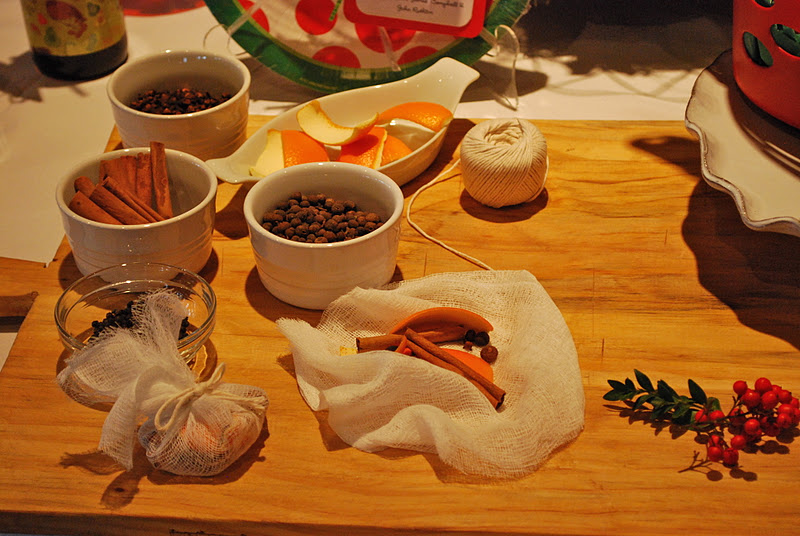
This was such a cute idea - handmade mulling spices to make your home smell wonderful!

Yes, that is a daffodil bulb in a tin can!  Amazing how something that simple looks so great with the burlap, boxwood, and holly.  

Here's a spice rub for grilled meats.  Also love the wooden spoon on the container.

You could even take it a bit farther and put together a basket for the griller of the family.  This is really a simple gift in that all the items are easily available these days.

This is a basket for a "Game Night."  This would make a really cute Teacher's gift.  Sometimes this is just the thing to help someone pause and enjoy the season.

This was my favorite of the entire night.  It's entitled "12 days Ring & Run" and each gift is a "tongue & cheek" take on the 12 days of Christmas.   The idea here is to pick a special friend and each night starting on December 13th you drop off your gift without getting caught!  Here are few of the days.

The tag reads: "On the Fifth Day of Christmas, your true love gave to you . . .five golden rings, but sorry, we're too poor for golden rings, but will some golden pineapple rings do?"  

Some Ben Gay for the Lords of Leaping - they'll need it!

For an entire list, click here or use your imagination to come up with takes of your own.

This is the perfect gift for your children to give their classmates!  Simple red M&M's, in case, Rudolph needs an extra.  

Here are few others . . .


The entire night was very inspiring and the totally put me in the spirit (ok, I was already there, but it was still a ton of fun).

If you are still not quite in the spirit and live in the Birmingham area, here are two really special events to totally put you in the mood - Birmingham Home and Garden Inspiration Home and IPC Holiday House Tour.  We are so fortunate here in Birmingham to have such talented decorators and floral designers and both of these events are simply a feast for the eyes.  Grab a girl friend and make a date to check them out!!  Happy Weekend. M.


Senin, 30 November 2015

DIY Lamp Knock Off

I have long admired these gorgeous lamps . . . 
I think a pair of them would be stunning on a buffet, console table or even as bedside lamps in a master bedroom.  But at $645.00 each, they are just not in the budget here at the Smith T house. 

So, here's my idea for a knock off of them.  I have not tried this, but the idea is so simple I am confident someone out there in Internet land has thought of this and actually completed the project.  If you are listening, please send me a picture and your thoughts!   

Take a pair of these at $20 each . . . 

Turn them upside down and add this (to what was the bottom but is now the top) using a glue specifically for bonding metal to glass . . .

Or, if you're just not up for a DIY project,  take the vase to a lamp shop, along with a picture of the original and ask them to do it for you. It really is a nominal fee compared to what you would pay for the original. 

Then add a tapered drum shade like this (along with a bulb clip) . . . 


And you've got yourself a very high end lamp for less!  M.

Senin, 28 September 2015

If I Were Handy . . .

I would zip over to IKEA and pick up this for $299.00 . . . 

Then I would order some chalk paint which is very forgiving and easy to work with.  I would get it in this color . . . 


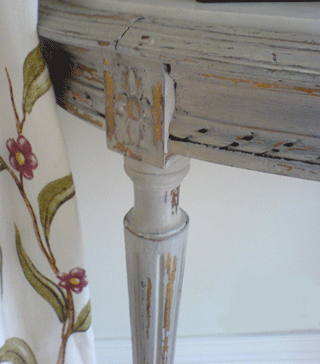
Then I would sand off a bit of the paint on the edges to let the original color show through like this . . . 


Then I would change the hardware to these ($4.76 each) . . . 


And get a very similar look to this for a fraction of the cost . . . 


This stunning piece retails for $1,500.00 and is on sale for $699.00 at Kings Lane this week.  


Artwork Tip: If you are in the Birmingham area and want to check out some amazing original artwork, my talented friend Ashley Terrell is in town showing off her work.  You can see and purchase her pieces on Thursday, September 29th from 10am-7pm at the home of Betts and Lauten Johnson (2201 Shades Crest Road). Ashley's calling the show "Art with Reach" which is so appropriately titled given her affordable prices!    Have a great day.  M.

Sabtu, 12 September 2015

DIY Project

I've been working on a project with this really cute couple who live in Homewood.  We are freshening up their main living space which includes a dining area and family room in their adorable bungalow.

This space has a couple of things going for it.  It's open, so visually it feels large. It also has tons of light, so it's bright and cheery.  The house sits on a hill with a great vantage point and has wonderful views from the front and back.  The space also has it's challenges.  There's only one wall that does not have a door, window,  or fireplace on it which makes furniture placement difficult.  (In fact, they have arranged the furnishings every way imaginable, with no luck.)

I came up with a new layout for the space using their current furnishings and adding a few additional pieces with a better scale for the space.  We actually flipped the original placement of the dining room and sitting area to take advantage of the one large wall for the placement of the sofa.


So. . . .
At this point, you may be wondering why I titled this post "DIY Project" - I getting there, I promise!

 In my design plan, I included a starburst mirror over the fireplace for major impact when you enter the room (you can see it's placement in the layout above).  Since these mirrors can get really expensive and totally blow a budget, I did some research and found this amazing DIY starburst mirror.
source

I knew this client could pull it off because the husband and his dad are both incredibly talented woodworkers.  Here's the result (the wife sent me this on her iphone, so the picture is small and not super clear).


They decided to use a coat of varnish over the entire thing just to bring out the color of the wood, but don't you love the different tones of wood included in the piece?!  We are going for a more rustic casual feeling in their home, but this could easily go in a glam direction if you painted it gold.  To get something like this . . .   


There's your sneak peek!  Hopefully, my client will send me a few other pictures when they finish purchasing all the items and re-arranging the space.

If you are feeling inspired and would like to make one of these for your house go to Addicted 2 Decorating(she is so clever!) and read about the original project and then go to Blue Hydrangea to see the design we used which is a variation of the original project.

I have lots of other affordable interior design ideas.  Contact me if you would like for me to create a design plan for your space.  M.   

Senin, 24 Agustus 2015

Picture Hanging Details

On Monday, I posted about hanging pictures from a brass chain to get extra impact from your artwork.  It was such an easy project I wanted to share with you what I used and how I did it. 


Step One
Get a plan - Dig around your house and find some artwork.  (It may even be stored in a box at the moment).  The goal here is to use something you already have on hand.  Then, find a wall in your home where you're looking to add some impact with artwork.

Step Two
Hang the artwork on the wall as you normally would with a simple nail or picture hook. (The chain is just going to be used to get the look, not support the piece.)  I chose to hang my prints lower than usual, to fill up more wall space and allow your eye to notice the chain detail.  As you can see from this picture, the bottom of the artwork is almost even with the bottom of the light switch to the right.  Obviously, you will need to take into consideration the size of your artwork and ceiling heights to get the right placement.  


Step Three
Measure the width of your artwork and divide this number by three to get the proper placement of the chain.  As I tell my son, "wake up those brain cells!!!" For example, my piece was 21 inches wide.  So, 21 divided by 3 is 7 inches.  So, the chain should hang 7 inches from the outside edge on each piece.  BTW, it is very important to measure this (don't eye ball it)!  Your eye will be drawn to the chain, and if it isn't even, it will not look right. 

Step Four
Using a yard stick and a level, mark the points on the ceiling where the cup hooks will go based on the calculations above (this will hold the chain), and screw the hooks in place.  I have crown molding which required I place the hooks just below it.  If you don't have molding near your ceiling, you can either place the hooks just near the ceiling or it would look great if you placed the hooks directly into the ceiling nearest the wall. 

I purchased two different sizes of cup hooks and ended up going with the larger one because my chain would not fit in the curve of the smaller hook.  Here's a link to the one I ended up using - Large Brass Cup Hook

Step Five
Select a flat chain for this project so that the picture will lie flat to the wall.  I used Brass Sash Chain, but you could also use this or even this if you liked the look better.  Also, I used brass for my project because I had a gold frame.  I think it looks best to coordinate the color of the chain with the frame color.

Step Six
Place your chain on the hook and then cut it (with wire cutters) 3 inches longer than the top of the picture.  You want to have a bit of chain to tuck behind the picture. 

 And that's it!!! You now have a picture with impact.  One last word of caution.  This project is so easy and inexpensive that it's tempting to do it in every room.  Don't!!! These types of touches really loose their impact when you use it multiple times in your house.  So refrain! 
I would love to hear from you, if you do this project in your home! Have a good one.  M.