Tampilkan postingan dengan label Christmas. Tampilkan semua postingan

Sabtu, 26 Desember 2015

Christmas Aftermath

Take a deep breath and let it out very slowly.  Now, it's time to put the dishes away . . . 

Clean up the wrapping paper remains . . . 

And welcome in the new year!  I am full of hope and anticipation as to what this coming year might bring into my life.  How about you?  What big plans do you have on the agenda this year?!  Think about it.  The time is right. 

This week I'm cleaning like a mad woman and working on a couple of design projects for clients who will be expecting some fresh ideas in the new year!  So, I will be posting, but not every day.  In the meantime, I would love to hear about all your new year resolves, hopes and goals. M.

Sabtu, 19 Desember 2015

Wishing You a Wonderful Christmas

I've decided to take a break this week from blogging to spend some quality time with my family.  
Here's wishing you all the joy, peace and comfort you are dreaming of this holiday season.

I'm filled to the brim with gratitude to all of you who continue to follow and read my daily posts.  You have brought me more joy, peace and comfort than you could possibly imagine.
So, before I get too misty or sappy . . . Peace Out!  See you next week.  M.

Rabu, 16 Desember 2015

Cool Christmas Tree

Last week, I was greeted by this when I opened the door to my salon.  The creativity of the human mind never ceases to amaze me!  I had a difficult time getting the entire image in the frame (talk about an Amazon), but at the bottom of the tree there is gold tulle that finishes the dress.  The PERFECT tree for a salon, don't you think? 

I finished my last Christmas decorating job yesterday, and now I am full on - operation Christmas presents for the family.  So, wish me luck - not excited about facing all the crowds but it must be done.  Enjoy your weekend! M.

Minggu, 13 Desember 2015

Christmas Fluff

The last couple of weeks I've been spending a lot of my time focusing on Christmas decorations for clients.  I know there are lots of interior designers who "don't do Christmas decorations" which is totally fine.  But I adore it!  I think it is such a fun creative way to style a home, and it only happens this time of year.  

I've done some bigger jobs (still have one to go) with the whole shebang from the outside garland with lights to all the mantels and entryways.  I love being able to create a feel for the entire home.  But, I've also been doing a few in the "Christmas Fluff"(totally made this term up) category.  It's sort of like going to have your hair blown out and styled (rather than a full on cut/color/highlight/straightner - and NO I don't do all those things to my hair!)  

For a Christmas fluff, the client will put up their decorations, and I will come in and zhush it up a bit with fresh greenery, ribbon, etc.  I will also put together arrangements and centerpieces for areas where they just want something new and different.

Here are a few pictures I took of a fluff I did for this super great family who were having a dinner party this past week.    For starters, they have an amazing home.  It's simply beautiful.  

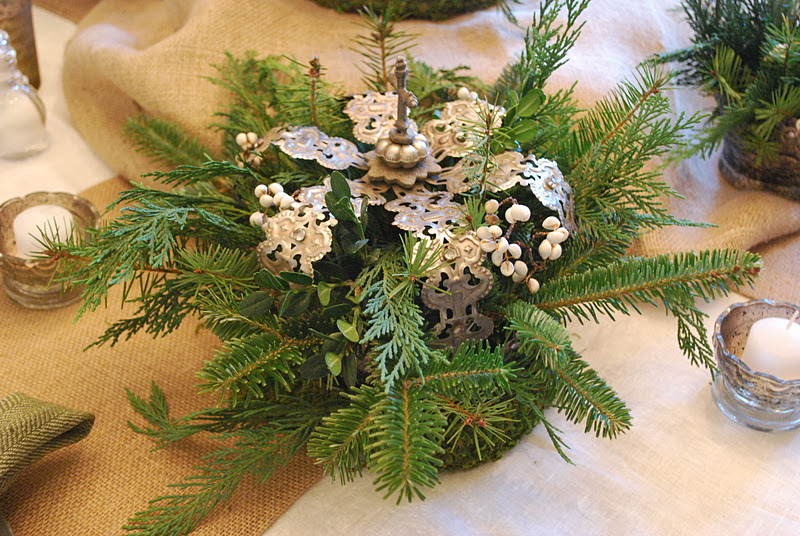
We started by meeting last week and brainstorming on what she might like for her table.  She pulled out these crowns and the deal was sealed.

I thought they were the perfect solution for a low centerpiece that allows your guests to see each other while giving you some major impact.

Two of the crowns are different while the third type is a set of three in decreasing size.

I used my tried and true trick of three different types of greenery and she happened to have these dried white berries from another project, so I incorporated them to give the arrangements some contrast. 

I think they are simple yet still very elegant in keeping with her gorgeous dining room.

As for other rooms, I added some greenery to this bowl of Christmas ornaments in her family room - just a little zhush.

I thought the table needed something fresh to finish it off. 


Then in her breakfast room, we did some fun things with more color.  Sorry the picture has such a glare.  It was a very sunny, and the light was not cooperating with me!  

This sitting area is to the left of the breakfast room table.  So we put together this little container.  I think she picked up the cup on a trip to Scott's in Atlanta.  It's so simple to put an arrangement like this together if you are clever with the container you use. 

In this container we started with some floral foam covered with moss (this is a trick to help you use less greenery and flowers).  Then we added gerber daisies cut at three different heights along with some rosemary and holly from the yard.  super simple.

Have any of you finished your Christmas shopping yet?  If so, please don't say as I am far far from finished!  I only want to hear from those of you who have been procrastinating or have been too busy to pull it all together - I need to feel better about my delay! M.

Rabu, 09 Desember 2015

This Weekend

With so many events to choose from this time of year, it's hard to know where to spend your time.  Well, let me help you out a bit.  

If you live in the Birmingham area and would like an hour or two of sheer interior design bliss, here's where you need to focus your time this weekend. . . 

IPC Holiday House Tour
I am always amazed by this tour.  The ladies in charge of this tour do an amazing job selecting a wide variety of homes (in both style and size) all of which have be touched by the style mavens of our city. 

The Home of Doug Davis
(interior designer for Tracery Interiors)


The Home of Betsy Brown 

The Fulmer Residence


The Wagoner Home


Every detail is styled to perfection - just for you!!! 
So, you know where I'll be this weekend!  Hope to see you there. M.
AND
If you are still wanting more, my dear little sugar plum fairies?  

For this weekend only, your Holiday House ticket will also get you in to the Birmingham Home & Garden Inspiration Home.  For free!! 

I attended a grand finale party at the inspiration house this past week, and I will tell you -  it did not disappoint.  Every single furnishing in the home has been so thoughtfully selected - lots of limed washed wood walls and ceilings, Circa lighting, and the most delicious fabrics.   


Happy Weekend. M.
Selasa, 08 Desember 2015

Enjoying the Month - Advent Style

Every December, I get out this very cute Christmas tree wall hanging with the days of the month magnets and my kids fight take turns placing the days on the tree as a countdown to Christmas.  Each day is a different shape - candy canes, presents, elves, etc.  In addition to this, we've always celebrated with an advent wreath we light each week to represent the season.  This year, I had to come up with something different.   
To make a very long, boring, almost painful story short - I decided to decorate our home without using red in any of my decorations (both inside and out).  Instead, I decided to go with golds, whites, chocolate and a fern green.  It really does look beautiful.  BUT, I had no idea how much this "on the fly" decision would impact my decor.  Lots of things you don't think about - including our Christmas tree countdown (it had tons of bright, reds and greens) and our Christmas stockings (which is a totally separate post!)

Well, I did a little brainstorming and decide to combine the countdown with an Advent concept. 

There is one for each day of the month, and inside there is a Bible verse for the day and a trivia thought related to Christmas - history of the Christmas tree, several Christmas carols, even Norman Rockwell and how he got his start.  Yesterday, the trivia note was about cultures who celebrate by drinking Wassail.  We even made a recipe of it to try!  Very fun.      

I relied very heavily on this amazing Advent Calendar from the Teaching Mom to create ours.  I just tweaked the days of the activities based on our schedule.

Then, I spruce up a basket (it's actually my Easter basket when I was a kid) with some greenery and a gold organza bow.  It's been very fun and a great way to remember why we celebrate Christmas.  I hope you are taking time out to enjoy the season. M.

Senin, 07 Desember 2015

Christmas Decorations - Dining Room

Can I tell you how thrilled I am it's Friday!  What a crazy week it's been . . . I've been working on design plans, Christmas fluffs for clients as well as my own decorations.  To add to this, I'm cleaning out my kid's rooms to make way for the addition of Christmas stuff.  All in all it's been productive, but totally chaotic.  So, I wanted to end the week on a calming/inspiring note.  

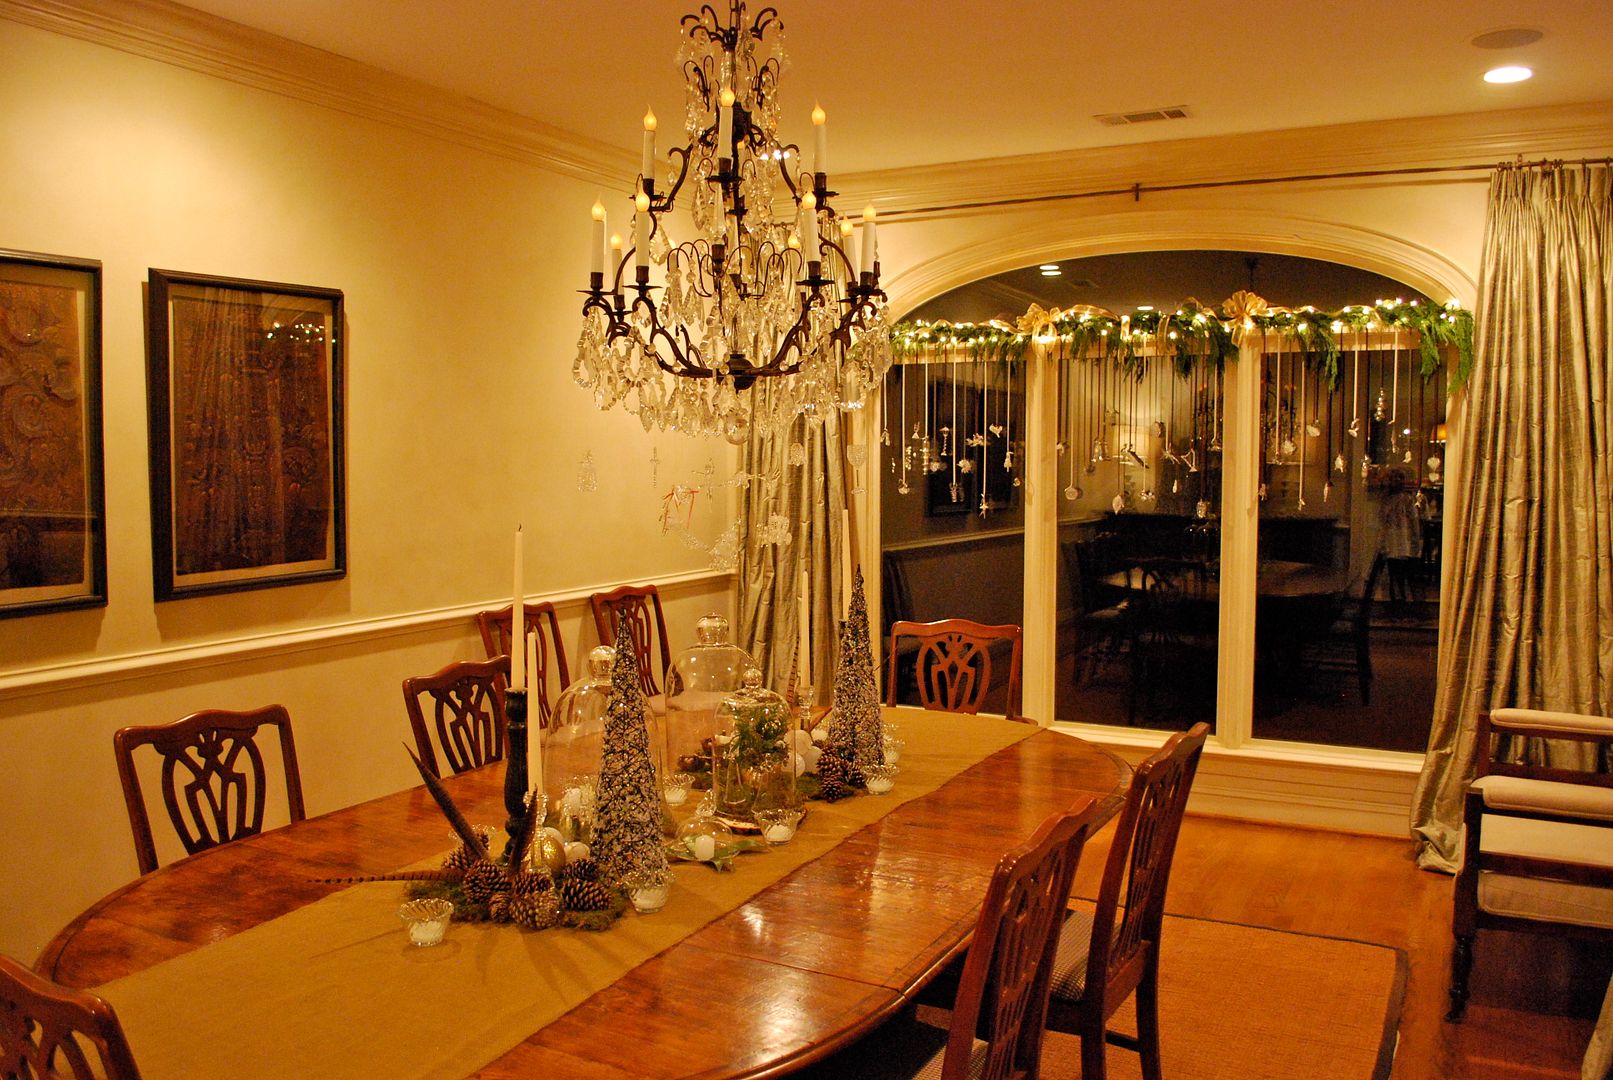
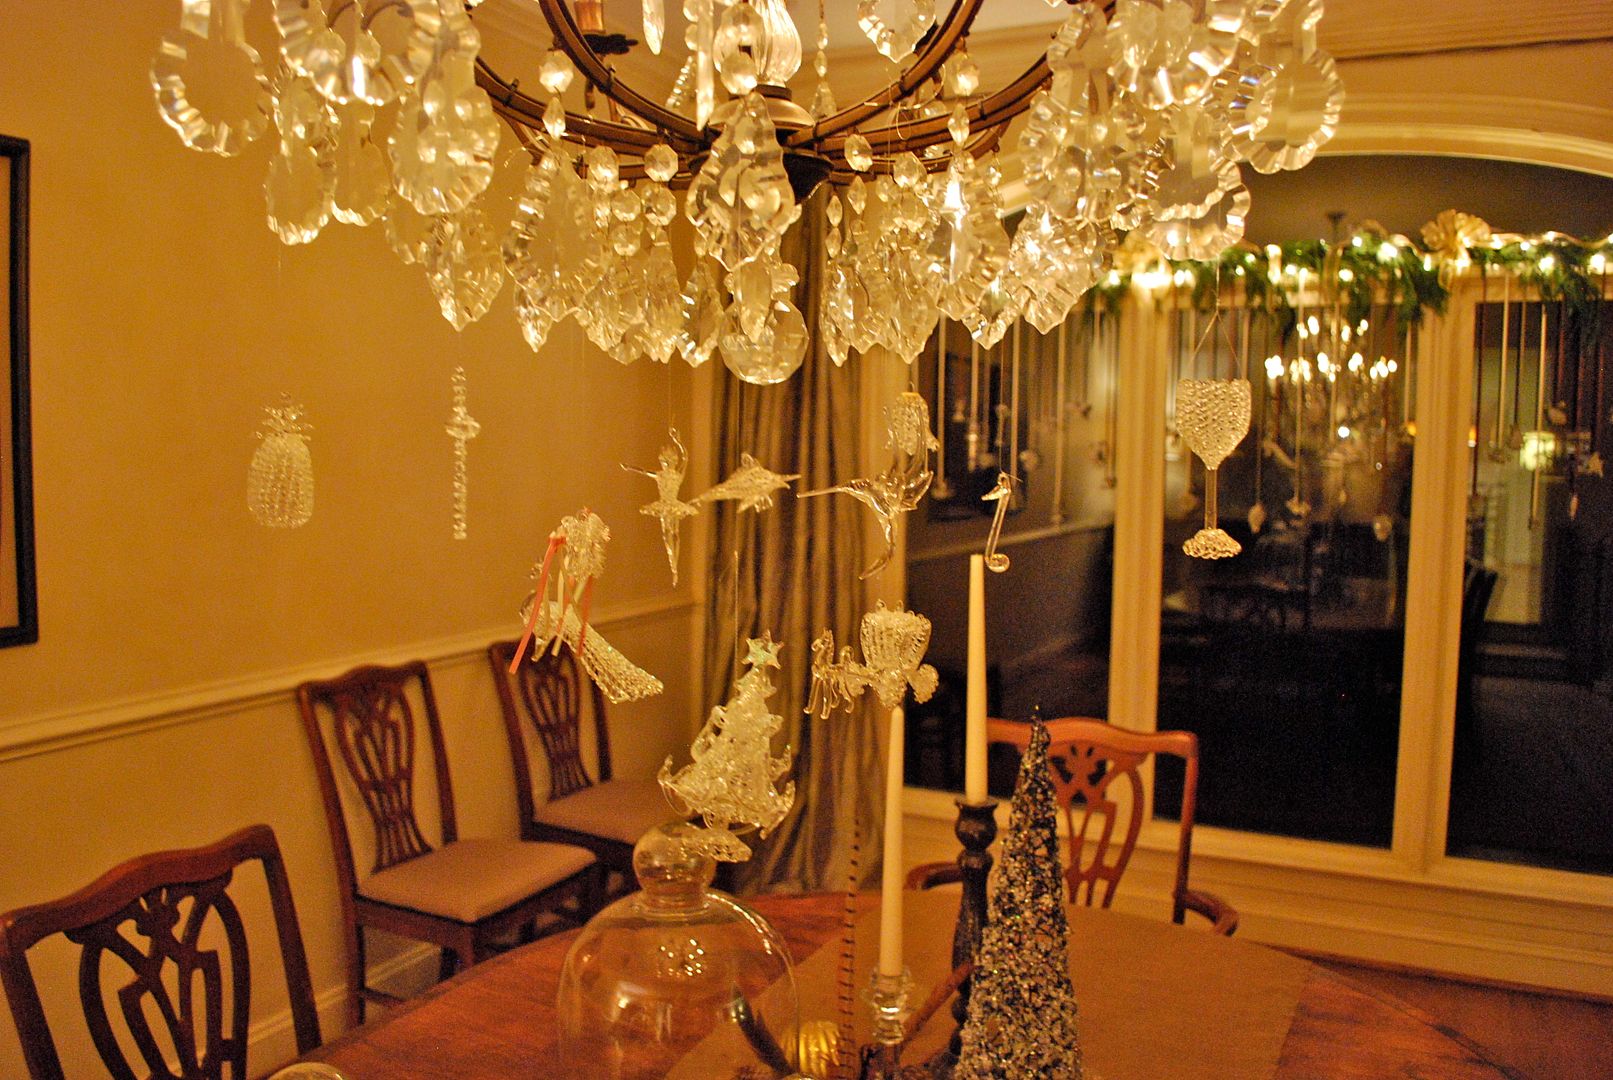
Here are a few images of my dining room all decked out for the holidays.  One caveat, it was very difficult to photograph, and I found the ornaments could be seen more easily at night.

Here's a view from the other side of the room. 

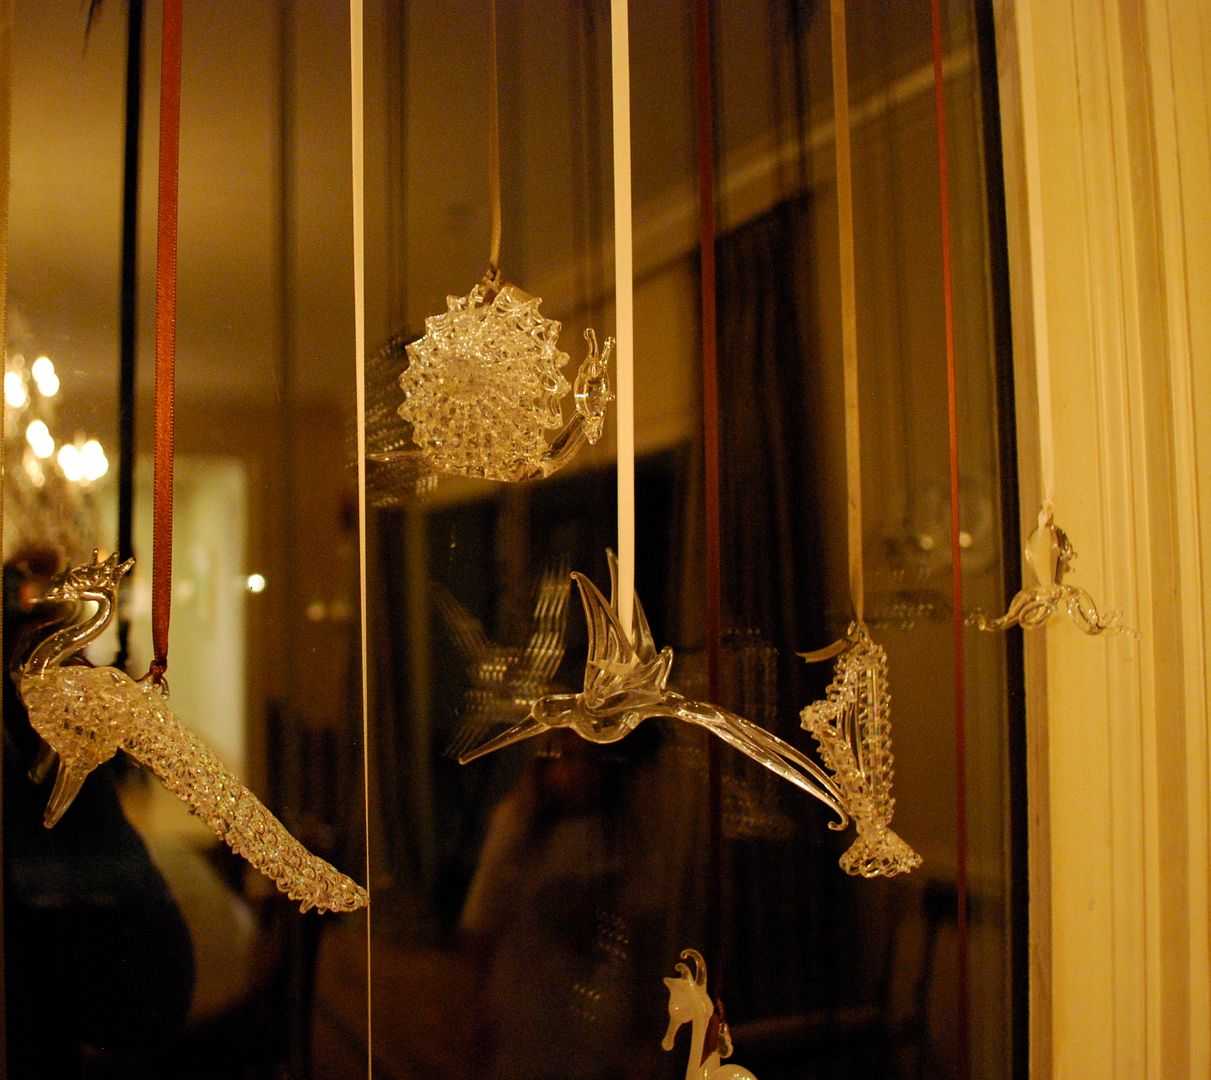
This past fall, a very dear aunt of mine called and asked if I wanted all her blown glass Christmas ornaments.  She's had these since I was a kid.  I still remember her Christmas tree covered in them.   I would walk around it picking out my favorites - the ballerina, Cinderella's carriage, and a Christmas tree. After I picked myself up off the ground and thanked her for this very special gift, my mind started racing on what I would do with them.  

Since the ornaments are clear glass, they are very difficult to see on a tree.  You really need colored lights to give them some interest.  In addition, these ornaments are the most fragile things I've ever used in decorating a space.  Since I have white lights and my kids are not super careful around our tree, I decided to use them in my dining room.  

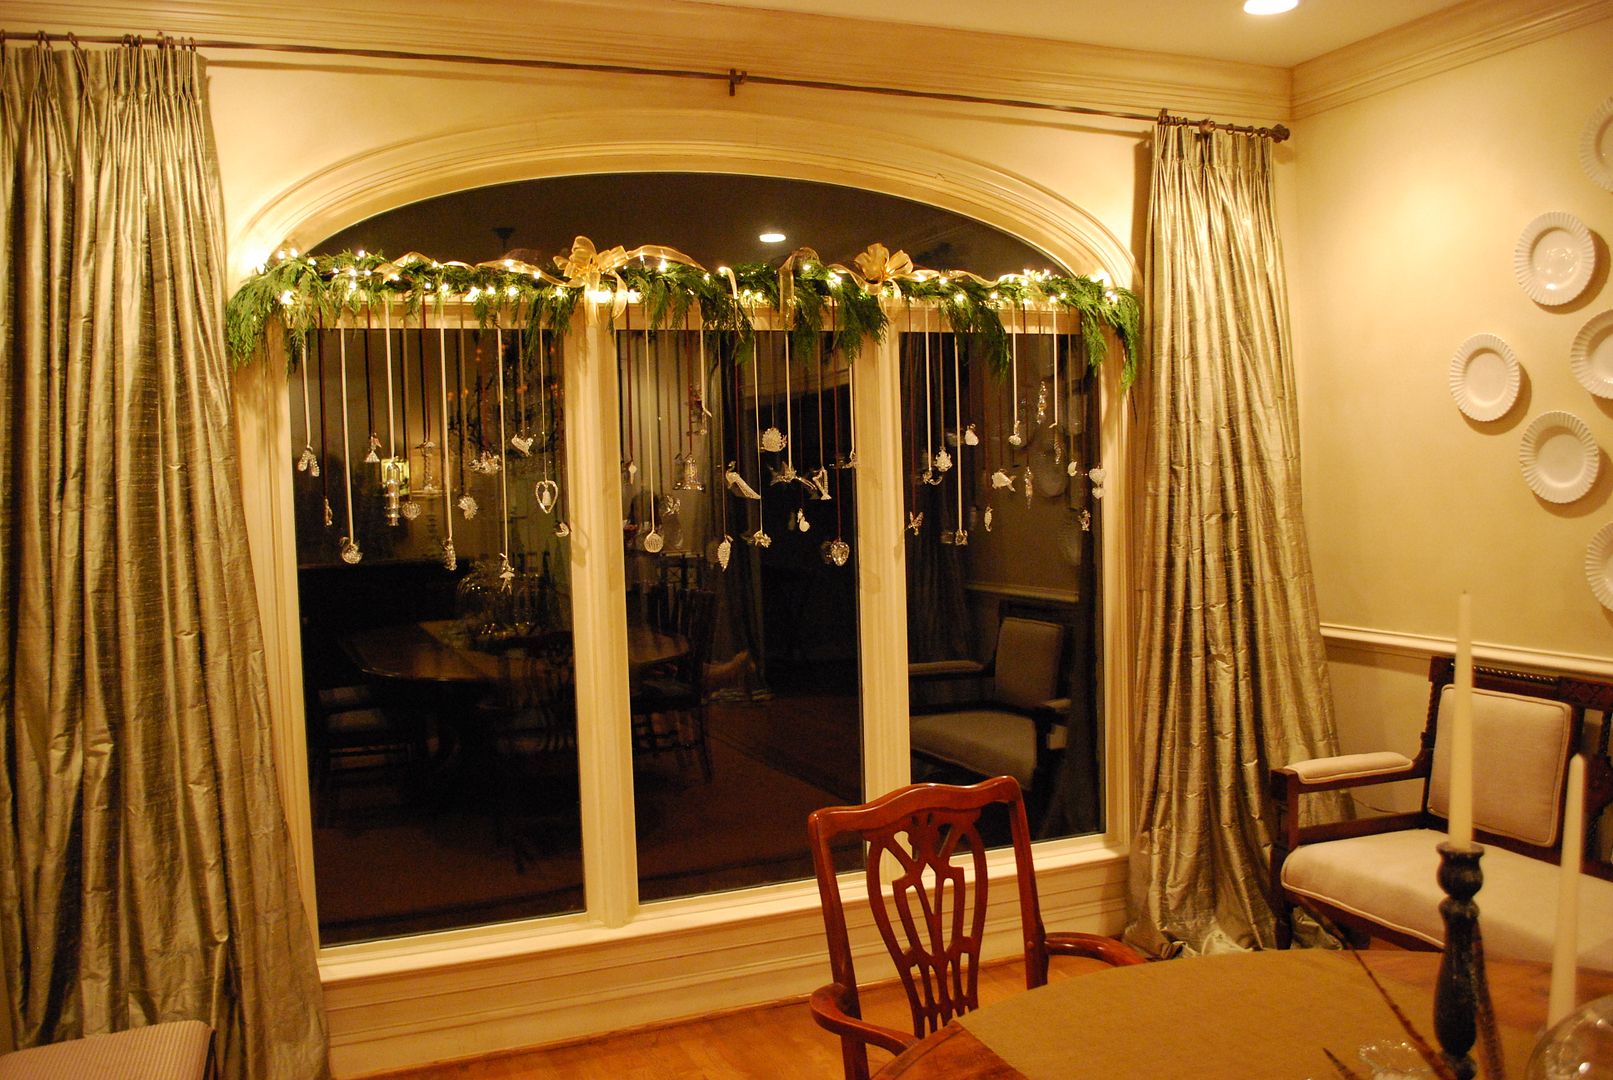
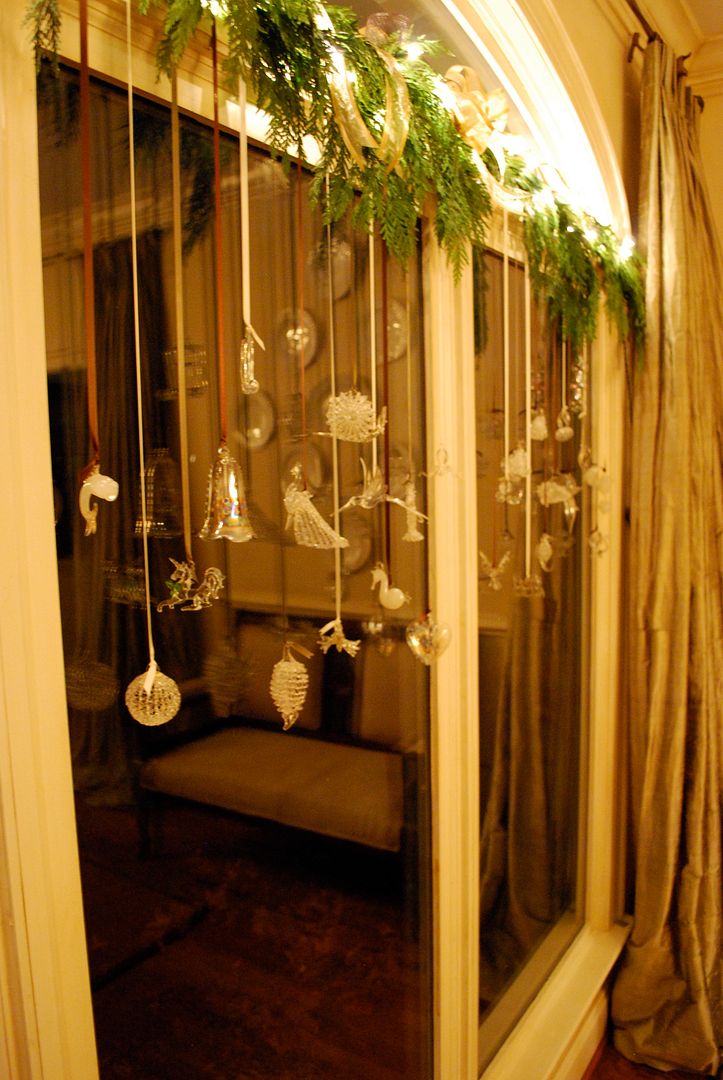
My solution was to hang them from ribbon (1/4" chocolate, moss green and cream double sided satin ribbon) in front of the large windows in my dining room.  By grouping them, you really get some impact.  And by suspending them from the ribbon,  you can appreciate all the intricate details of each one.  They truly are like little works of art.

The small ledge from the transom window gave the ornaments just enough space to float in front of the window.  I then added some cedar garland with one strand of white lights to the top to hide the hooks, and I threw in some ribbon for good measure.  As an aside, I did not make a million nail holes in my window frame - each ornament is attached to one of those small self adhesive clear hooks.  The garland is wired to three nails at the very top where they will never been seen. 

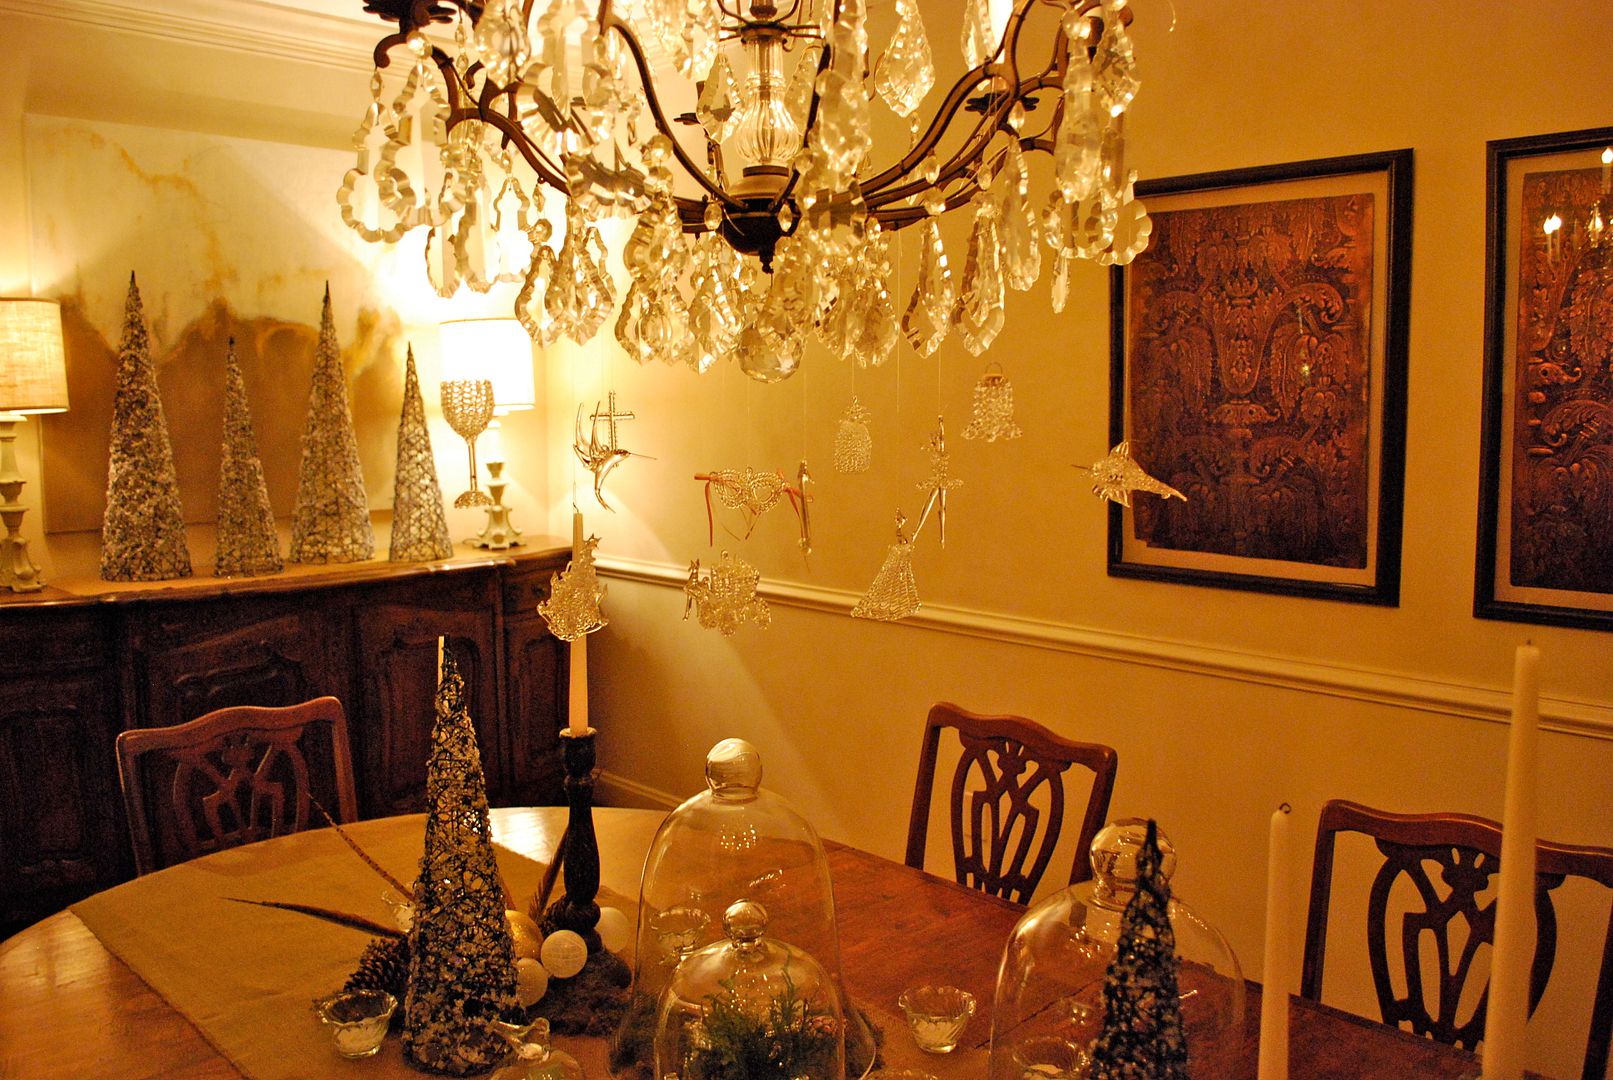
Then we (my daughter was waaay into this project) selected our favorites from the entire collection to hang from the chandelier.  I plan to add a bit of fresh greenery from the chandelier the night before our annual party just to hide the string.  I decided to go with the clear rather than ribbon here so our guest would be able to see each other and not be distracted by tons of ribbon hanging from the chandy.  Do you see the ballerina?? Makes me think of the Nutcracker!

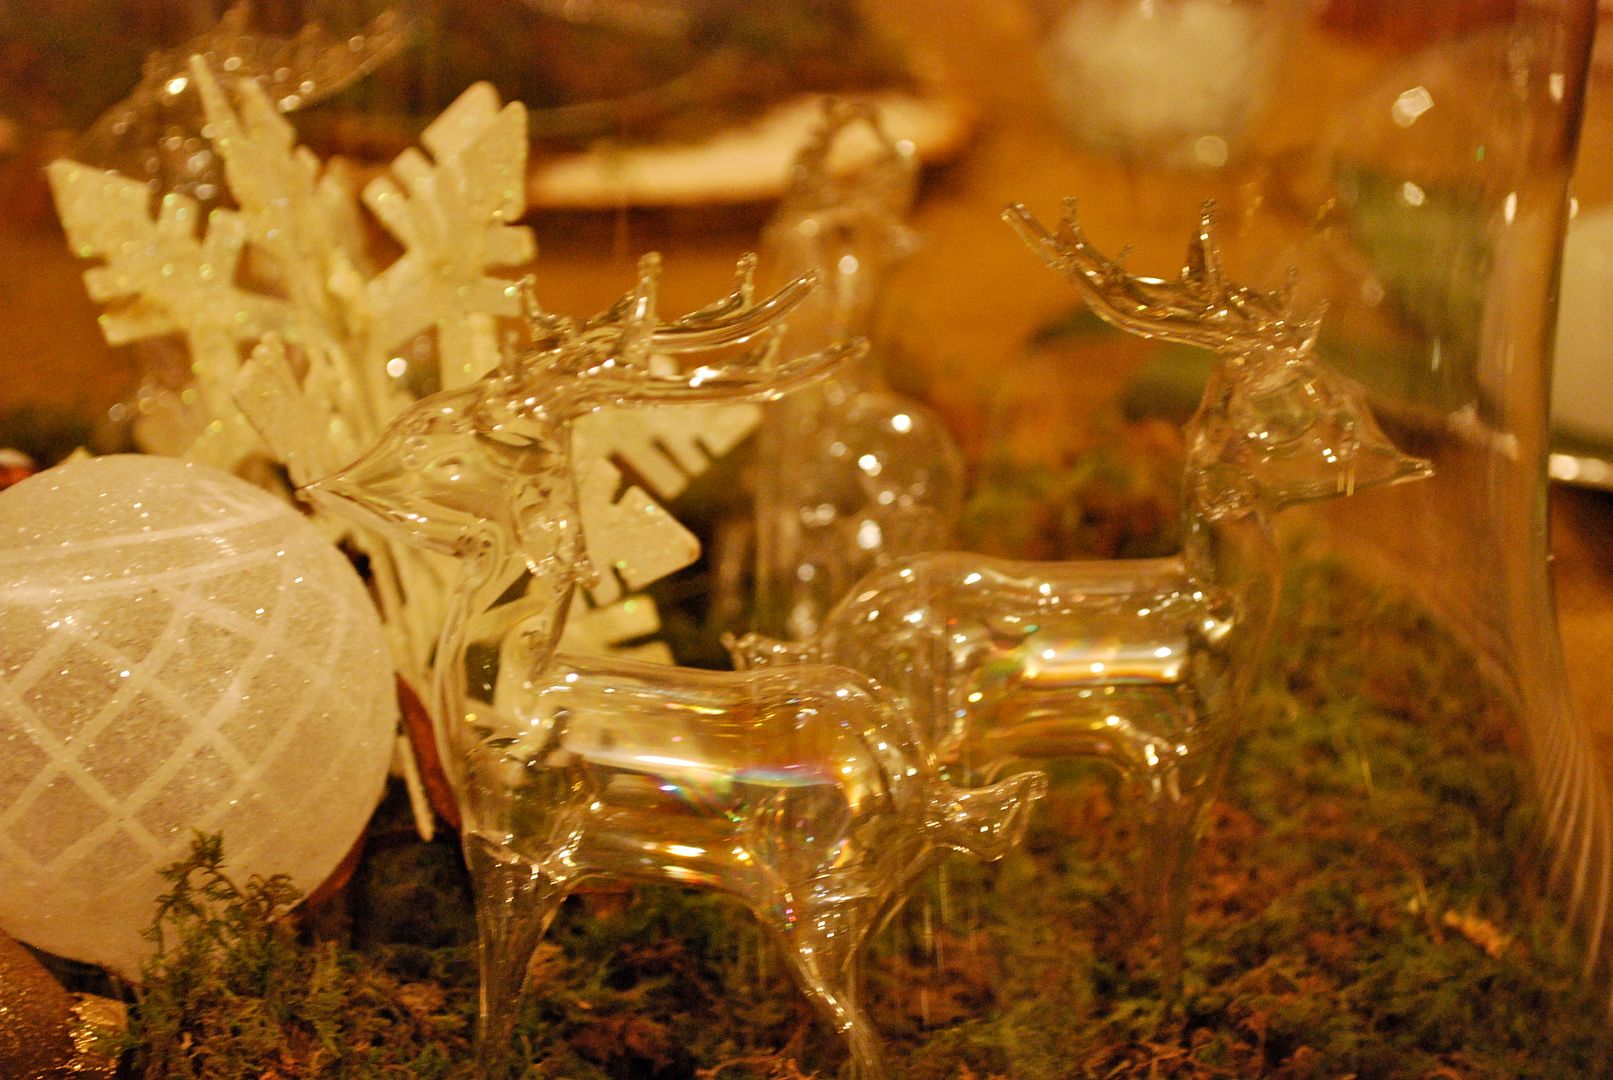
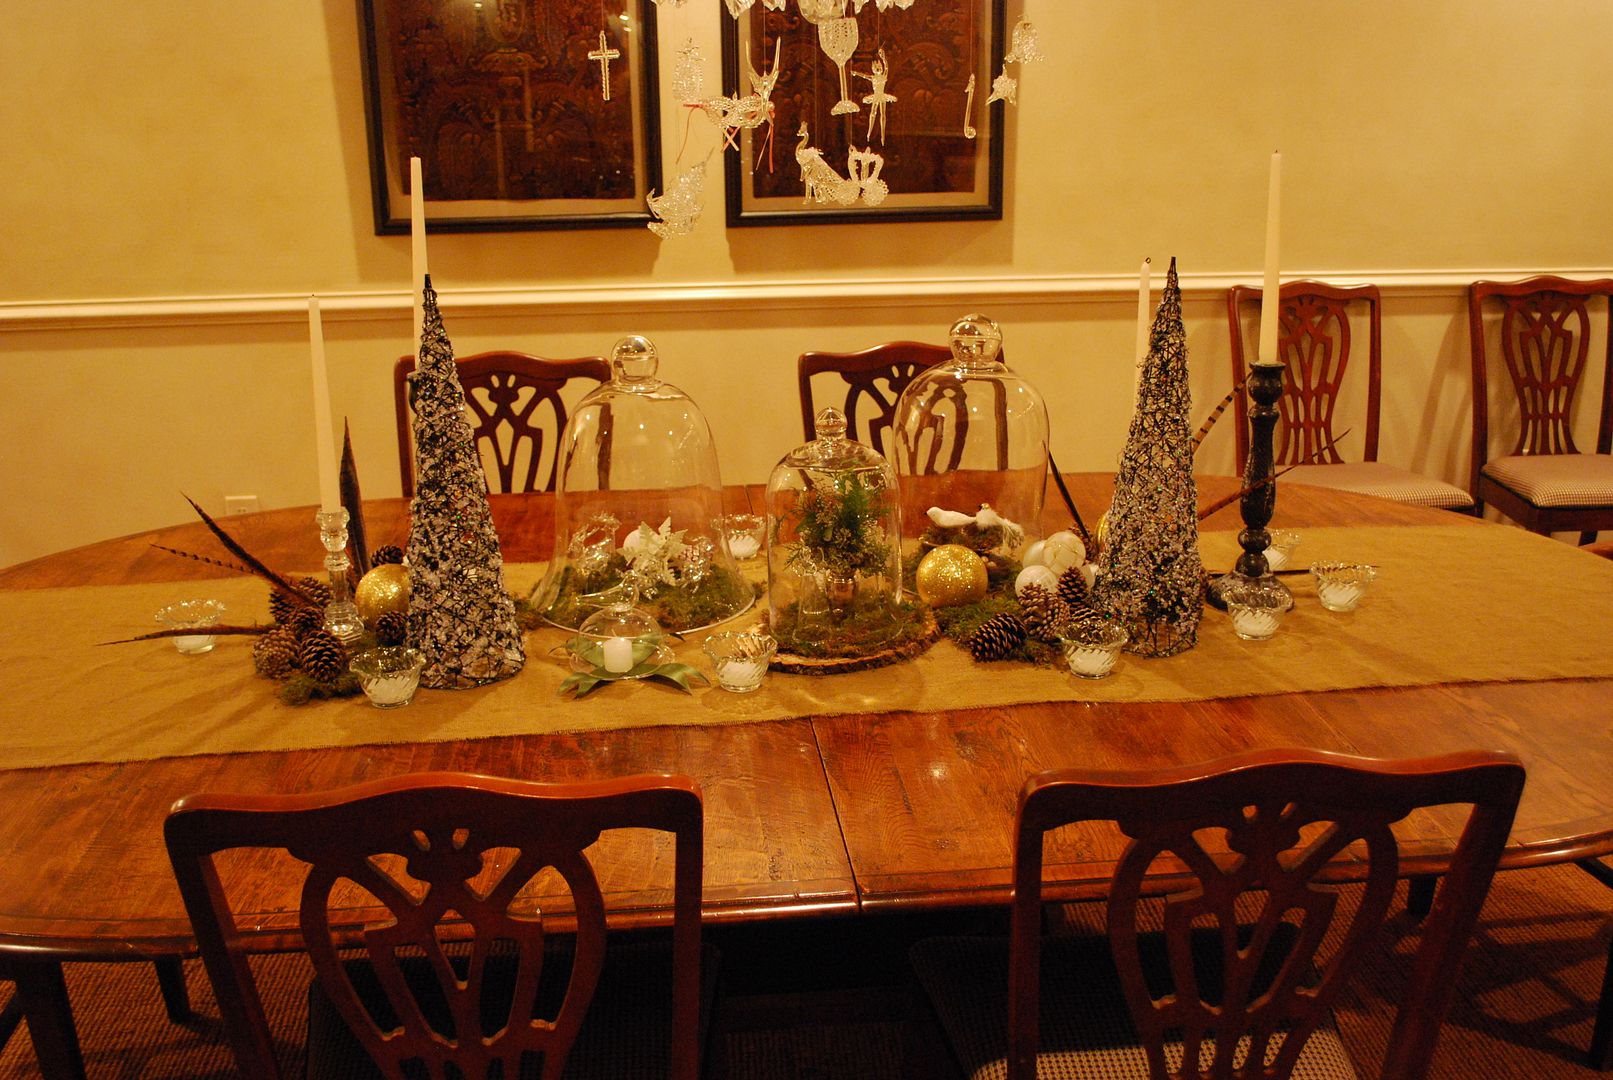
Then for the table top.  I decided to keep the glass/natural element thing going and added as much glass as I could squeeze into the center of my table. 

I already had the glittered trees, pinecones, pheasant feathers, sheet moss and candlesticks.  I did add the three cloches for more sparkle.  I got a great deal on them from here.  I saw a white burlap runner from Pottery Barn for $50, and decided to save a little money by going to the fabric store and purchasing three yards of natural burlap for $15.  I simply cut it the length I wanted and frayed the edges.  I had enough burlap to add a runner to my sideboard as well.  Then, I used things I already had under the cloches for little vignettes of Christmas. 

I hope everyone has a lovely weekend!  I for one will be taking a nap at some point. M.

Minggu, 06 Desember 2015

Entryway Arrangement Tutorial

As many of you know, I grew up in Mississippi on a large piece of property outside the city of Laurel. Every Christmas (even before Martha Stewart made it cool), my family would go out on our property and cut fresh greenery to decorate with during the holidays -  wild magnolia and bay leaf, holly, cedar and other evergreens, wild pyracantha and even chestnuts.  I grew up watching my mother create some of the most stunning arrangements you can imagine.  We used all different kinds of containers from large french baskets to galvanized oval shaped tubs.  So, decorating for Christmas brings back lots of wonderful memories for me, and I just love the process. 

I mentioned last week I would show you how to put together a large arrangement for your home like the one I did for Christmas Count Down.  Here's the final arrangement I made for the night.

And, here it is on my buffet in my dining room.  I changed out the branches for sandblasted manzanita branches to give me the look I wanted for my dining room, but it's the same arrangement.


Large arrangements are much easier to make than you think.
In general, remember "the rule of 3's."  There are three types of greenery, three types of ribbon,  three types of ornaments and the entire arrangement is laid out in a triangle.


Create a base layer by bunching up some burlap.  I bought mine on a random trip to Hobby Lobby.  It's just cut yardage, so I folded the cut edges under.

Select a container with some height.  I've had this container for years, and I use it for lots of different occasions.  It was an investment at the time, but I'm so glad I have it.

For a wire container, line it with moss and then place a water tight container in the center filled with floral foam that's been soaked in water.  As an aside, when soaking your floral foam, fill up a basin with fresh clean water and drop the foam in - that's it - do NOT push it down to submerge in the water, let gravity fill the foam properly)

Use floral stick tape to secure the foam to the bowl.

Every well designed arrangement includes something tall, fullness in the middle and something draping.  (another rule of three).  I like to start with the tall, I placed three large branches in the center making sure they're angled out a bit to provide space for the ornaments.

I added the draping element - these branches were from a very sun deprived scotch pine in my mother-in-laws yard!  It's a little difficult to see (b/c I'm not a great photographer), but I have grouped these draping branches to form a triangle.


Then I filled in around the base of the branches with large magnolias to cover the bowl, foam etc.  The shiny leaves are a nice contrast.   Again, I grouped them in three clusters to form another triangle.

Then, I filled in with some cedar just to draw your eye up to the the ornaments on the branches


Almost finished!  I added some ribbon to create a contrast in color with the greenery.  I used three different ribbons with three different textures.  I think when you cut all the greenery out of your yard (or a friend's yard!) you can splurge a bit on the ribbon.

Final step, I placed ornaments on the branches in a sparse way - three different kinds.  Don't over do it or it begins to looks like a hot mess!


Lastly, I added something special to the table - packages of Christmas cards from years past.  I've been collecting Christmas cards from each year since I got married.

During the season, John and I will pick a night to sit down with a glass of wine and go through some of the bundles.  It's always fun to see how people change and families grow.

I hope this encourages you to try an arrangement of your own! Have a great week.  M.